Pumpkin season calls for cozy sweaters, warm drinks, and a manicure that feels just as autumn-ready. Pumpkin nail designs can be playful and colorful, soft and feminine, or simple enough to wear every day. You can try tiny pumpkins on a nude base, glossy orange polish, delicate French tips, or a little chrome for extra shine.
The best part? You don’t need elaborate nail art on every finger to get a beautiful result. A single pumpkin accent can make a simple manicure feel seasonal, while different colors, shapes, and finishes let you create a look that suits your style. Here are 15 pumpkin nail ideas to save for your next salon appointment or at-home manicure.
1. Cute Pumpkin Nail Designs with Classic Orange Accents
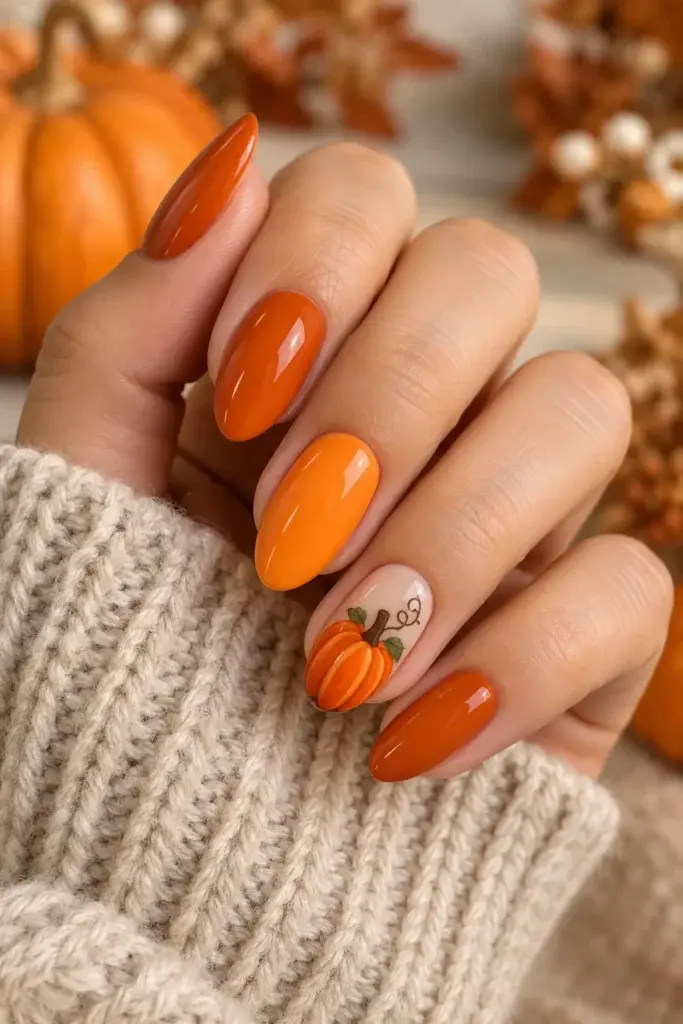
Classic orange pumpkins are a lovely starting point if you want a manicure that clearly celebrates fall. Use a sheer nude or milky beige base, then add small orange pumpkins to one or two accent nails. A thin green stem gives each pumpkin definition, while the remaining nails can stay glossy and simple.
For a playful Halloween version, add tiny black eyes and a curved smile to one pumpkin. If you prefer something suitable for the whole season, leave the faces off and keep the shapes rounded. This design works especially well when you want festive nail art without making every finger look busy.
2. Orange Pumpkin Nails for a Bold Autumn Look
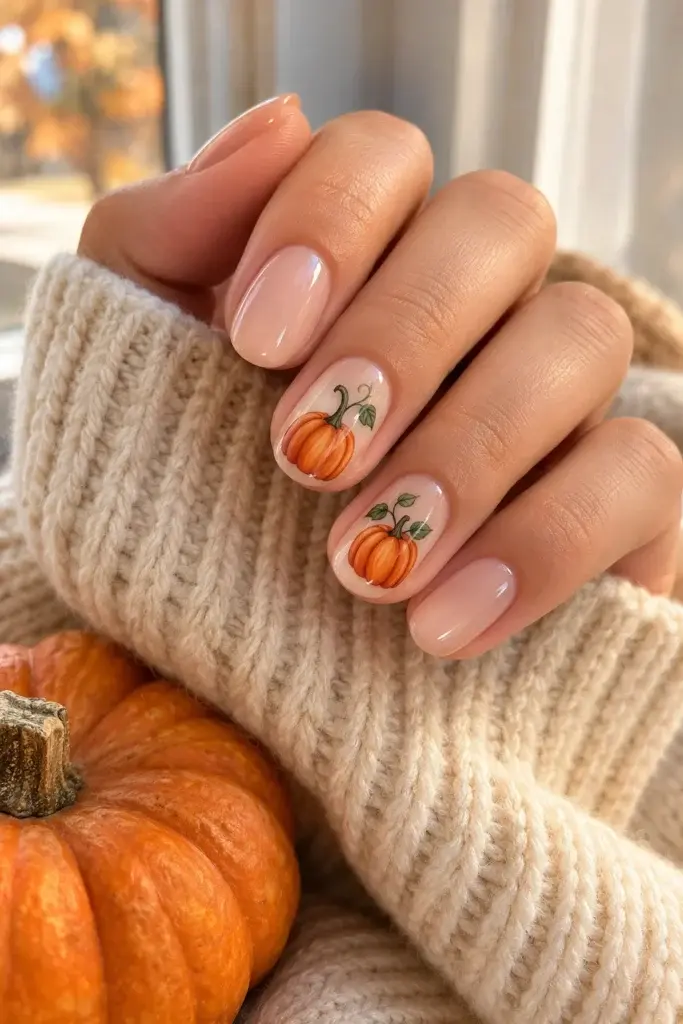
If you love bright seasonal colors, orange pumpkin nails make a cheerful statement. Choose a glossy pumpkin-orange polish for a clean, solid manicure, then decorate one accent nail with a tiny pumpkin illustration or curved lines that resemble pumpkin ridges. The combination feels coordinated without requiring detailed artwork on every nail.
You can also mix two shades of orange. Use a lighter tangerine on a few fingers and a deeper burnt orange on the rest for subtle contrast. A glossy topcoat keeps the colors looking rich. This is an easy option for anyone who wants a noticeable fall manicure that still pairs well with denim, neutral sweaters, and everyday outfits.
3. Pink Pumpkin Nails for a Soft, Feminine Manicure
Pink pumpkin nails offer a softer alternative to traditional orange. Start with blush, baby pink, or milky pink polish, then add small dusty-pink pumpkins to one or two nails. Fine white lines can define the pumpkin shapes, while tiny green stems introduce a little contrast without overpowering the pastel palette.
For a more coordinated finish, alternate plain pink nails with pumpkin accents rather than decorating every finger. This look suits anyone who likes delicate nail art and wants something seasonal without the stronger colors associated with Halloween. It also pairs beautifully with cream cardigans, soft pink accessories, and understated jewelry.

4. White Pumpkin Nail Designs for an Elegant Finish
White pumpkin nail designs are ideal if you prefer a neutral manicure with a seasonal detail. Begin with an ivory, milky white, or sheer beige base. Paint small white pumpkins on a contrasting nude nail, or use a slightly deeper cream outline so the pumpkin shapes remain visible. A fine gold line or muted brown stem can add definition without making the design too decorative.
For a minimal version, leave most nails plain and place one white pumpkin on each hand. This style feels softer than bright orange nail art and can work from early fall through Thanksgiving. Choose a glossy finish for a fresh look or a satin topcoat for a more understated effect.

5. Pumpkin Chrome Nails with a Metallic Glow
For a manicure that catches the light, try pumpkin chrome nails. Coppery orange, bronze, and warm amber finishes give the nails a reflective glow that feels right at home with fall colors. You can wear chrome on every nail or keep it to two accents alongside a plain caramel or nude polish.
A magnetic or metallic finish adds dimension without requiring intricate painted pumpkins. If you want a more literal pumpkin theme, ask your nail artist to add a tiny pumpkin outline over one chrome accent. Keep the artwork simple so the reflective finish remains the main feature. This option works especially well for evening plans and dressier autumn outfits.

6. Pumpkin French Tip Nails for a Chic Seasonal Twist
Pumpkin French tip nails combine a familiar manicure shape with fall-inspired color. Instead of traditional white tips, use orange, burnt orange, or caramel polish along the free edge. Keep the base sheer pink or nude so the colored tips stand out cleanly.
For a more decorative version, add a tiny pumpkin to one ring fingernail or use a thin gold line just below the orange tip. Short square nails look crisp with a narrow French edge, while almond nails create a softer curve. This design is a good choice if you want a seasonal manicure that still feels polished enough for work or everyday wear.
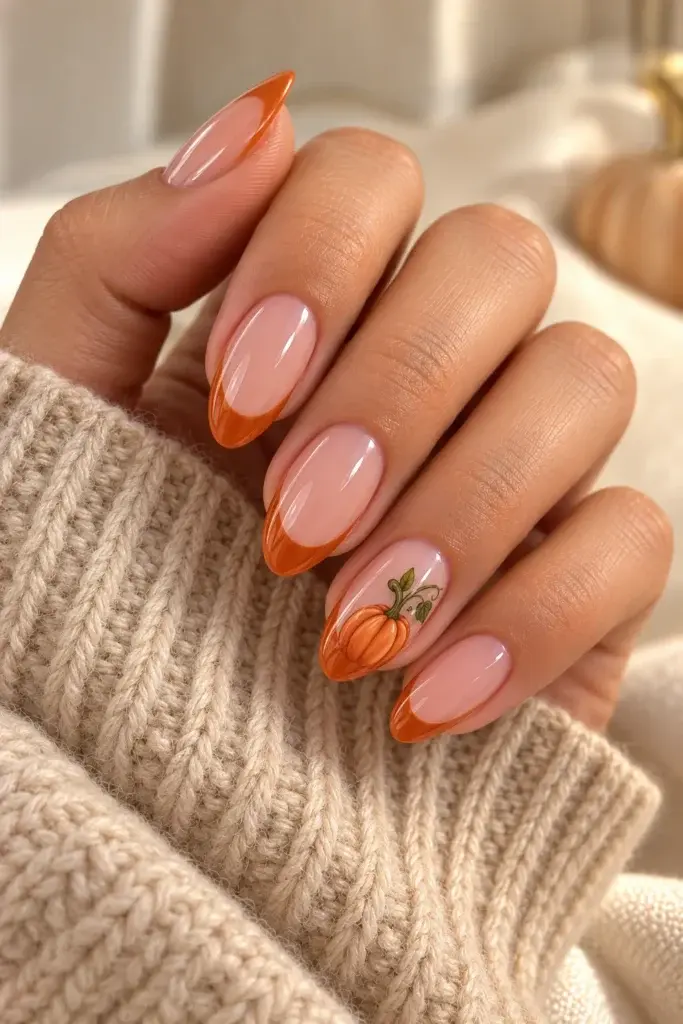
7. Short Pumpkin Nail Designs That Feel Cute and Practical
Short pumpkin nail designs prove you don’t need long extensions to enjoy seasonal nail art. A small pumpkin on one nail is often enough, especially when the rest of the manicure uses a neutral shade. Choose tiny rounded shapes and simple stems so the artwork stays clear on a smaller nail surface.
Short squoval and rounded nails work particularly well with this approach. You can also try orange polish on two fingers and a pumpkin illustration on the ring finger. Ask your nail artist to keep the details fine rather than crowded. The result is easy to wear and lets you enjoy a fall theme without sacrificing your preferred nail length.
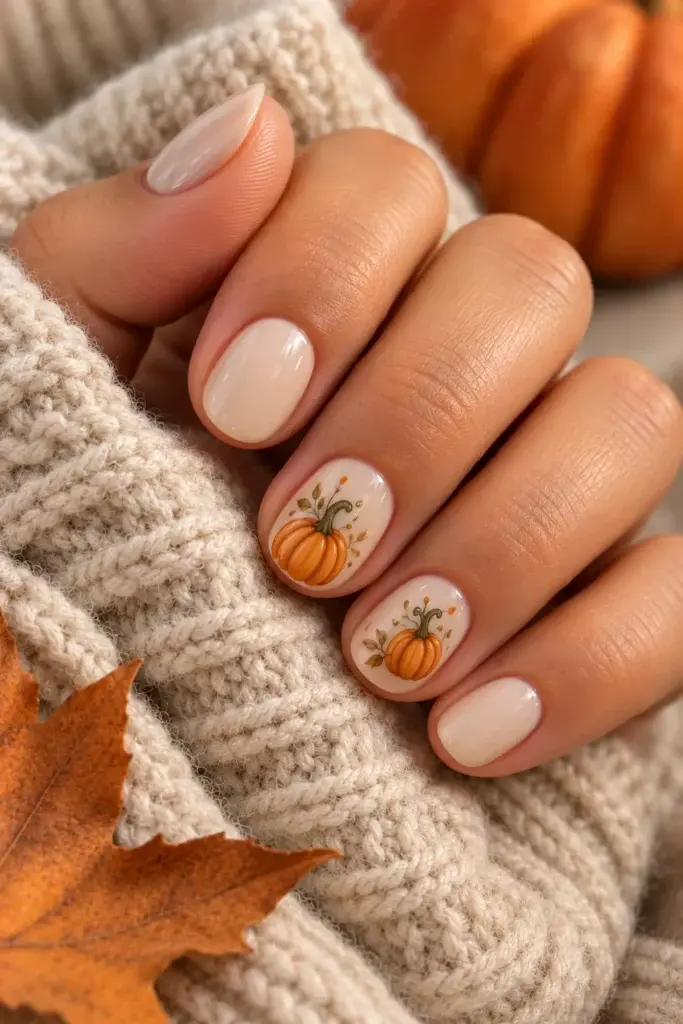
8. Almond Pumpkin Nails for an Elongated Look
Almond pumpkin nails have a tapered shape that gives nail art a graceful appearance. The elongated surface leaves room for a small pumpkin illustration, delicate curved lines, or a combination of orange and neutral polish. A nude base with one or two detailed pumpkin accents keeps the look balanced.
For a slightly bolder manicure, alternate glossy orange nails with cream accent nails. The contrast draws attention to the pumpkin artwork without making the whole set feel crowded. Almond shapes also suit fine French tips and metallic accents, so you can combine a couple of details while keeping the overall design coordinated.
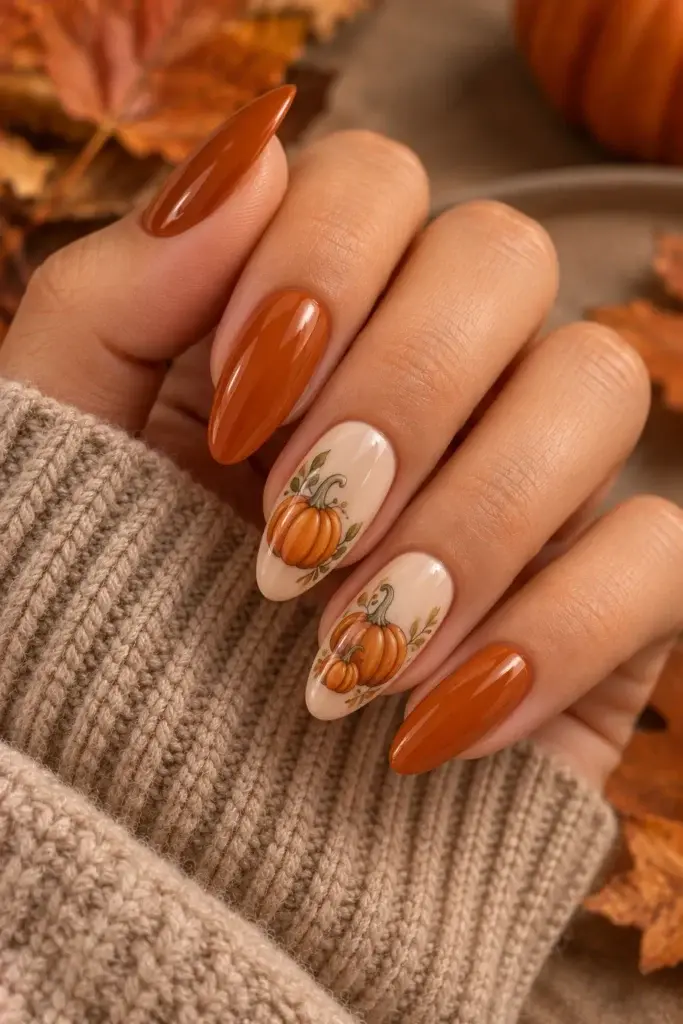
9. Matte Pumpkin Nails for a Soft Velvet-Like Finish
Matte pumpkin nails create a different mood from glossy seasonal manicures. A matte topcoat softens the shine of orange, rust, or terracotta polish, giving the color a smooth, velvety appearance. You can keep the whole manicure matte or combine matte pumpkin-orange nails with one glossy accent for contrast.
For a simple design, paint tiny pumpkins on a nude accent nail and finish the remaining nails in matte burnt orange. If you prefer a subtle look, use terracotta polish with no illustrations at all. The color alone can suggest the season. Make sure the topcoat is designed for your polish system and apply it evenly for a consistent finish.
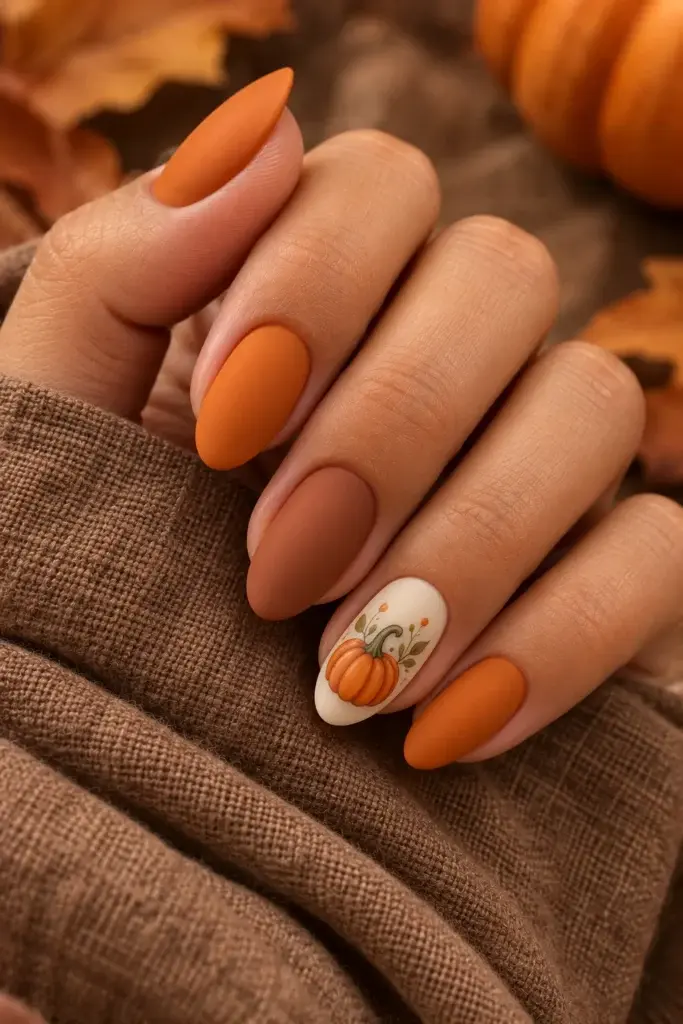
10. Glitter Pumpkin Nails for a Little Extra Sparkle
Glitter pumpkin nails add a festive touch without requiring elaborate nail art. Choose fine copper, champagne, or orange glitter for a warm seasonal finish. You can use glitter polish on one or two accent nails, then pair it with plain orange or nude nails to keep the sparkle from overwhelming the design.
For a pumpkin-themed accent, paint a small orange pumpkin over a neutral base and add a thin glitter outline. Fine glitter usually looks more delicate, while chunky pieces create a more noticeable party-ready manicure. If you are applying glitter at home, let each layer dry or cure as directed before adding the next one.
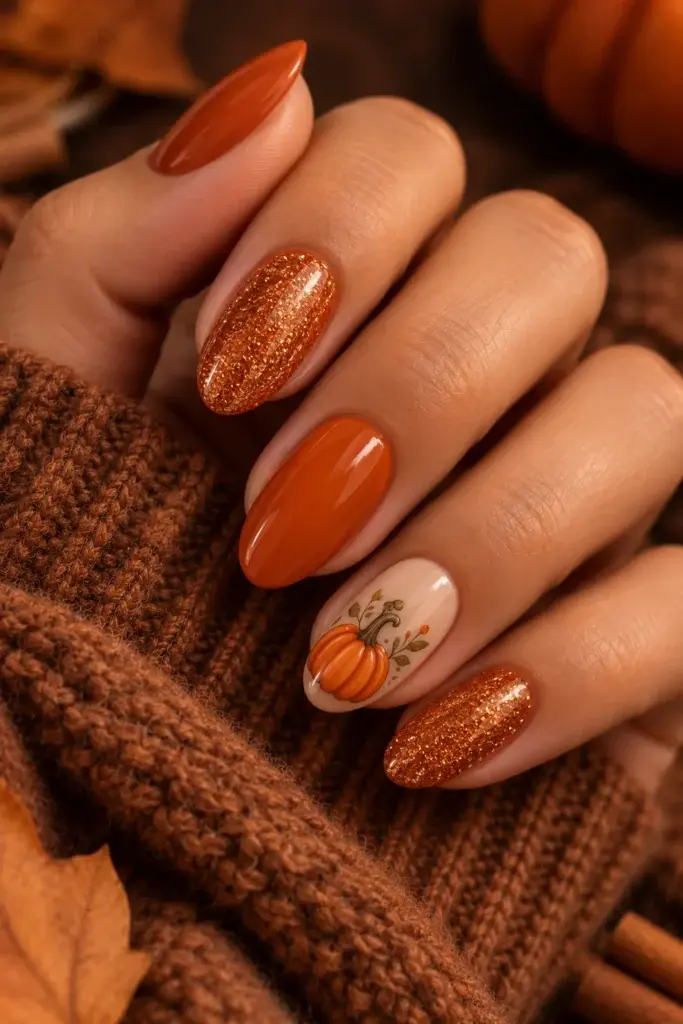
11. Minimalist Pumpkin Nails for an Understated Style
Minimalist pumpkin nails are a good fit if you like seasonal details but prefer a clean manicure. Start with a sheer nude, pale pink, or translucent milky base. Add one tiny pumpkin outline on a single nail, using a fine brush and a muted orange shade. A delicate stem is often all the detail you need.
Another option is a small orange dot with two or three curved lines to suggest a pumpkin shape. Keep the rest of the nails plain and glossy. The design is subtle enough for everyday wear and easy to adapt to short natural nails. It also gives you a seasonal look without committing to a full set of illustrations.
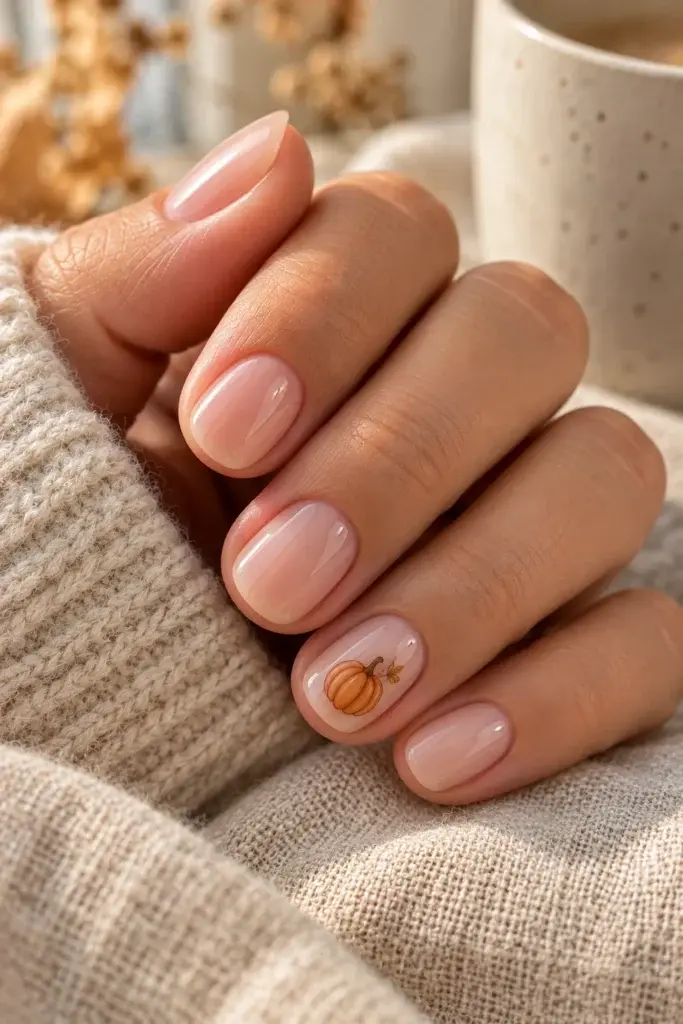
12. 3D Pumpkin Nail Art for a Raised Detail
If you want your manicure to have more dimension, 3D pumpkin nail art adds a raised decorative element. A nail artist can use suitable nail-art gel or sculpting products to create a small pumpkin shape, then add a stem and subtle grooves. One raised accent nail often makes a stronger statement than placing a large embellishment on every finger.
Pair the detail with simple cream, brown, or orange nails so the sculpted pumpkin stays in focus. Keep the raised design comfortable and appropriately sized for your nail length. If you use extensions or gel products, follow the product instructions and have intricate sculpting done by a trained nail professional when needed.
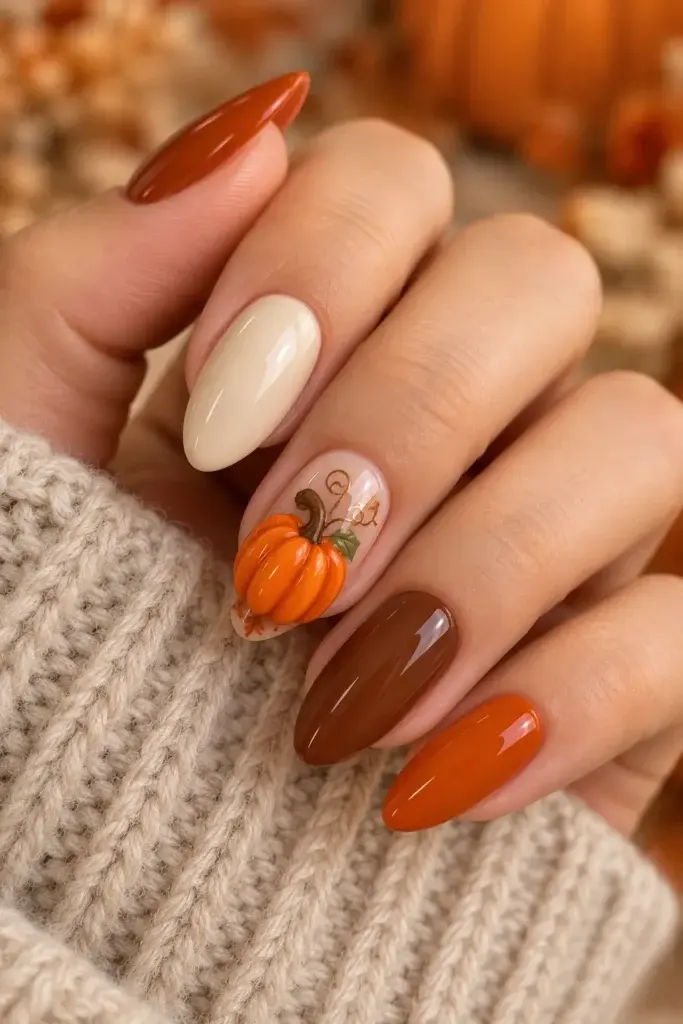
13. Black and Orange Pumpkin Nails for Halloween
Black and orange pumpkin nails bring a little Halloween drama to a fall manicure. Alternate glossy black nails with bright orange ones, then add a pumpkin face or tiny pumpkin illustration to one or two accent fingers. The dark base makes the orange details stand out, while a few simple lines keep the artwork readable.
For a more balanced look, use black only on the tips or as a fine outline around an orange pumpkin. You can also choose a sheer nude base with black-and-orange accents if a full dark manicure feels too bold. This design is especially suited to October parties and Halloween outfits.
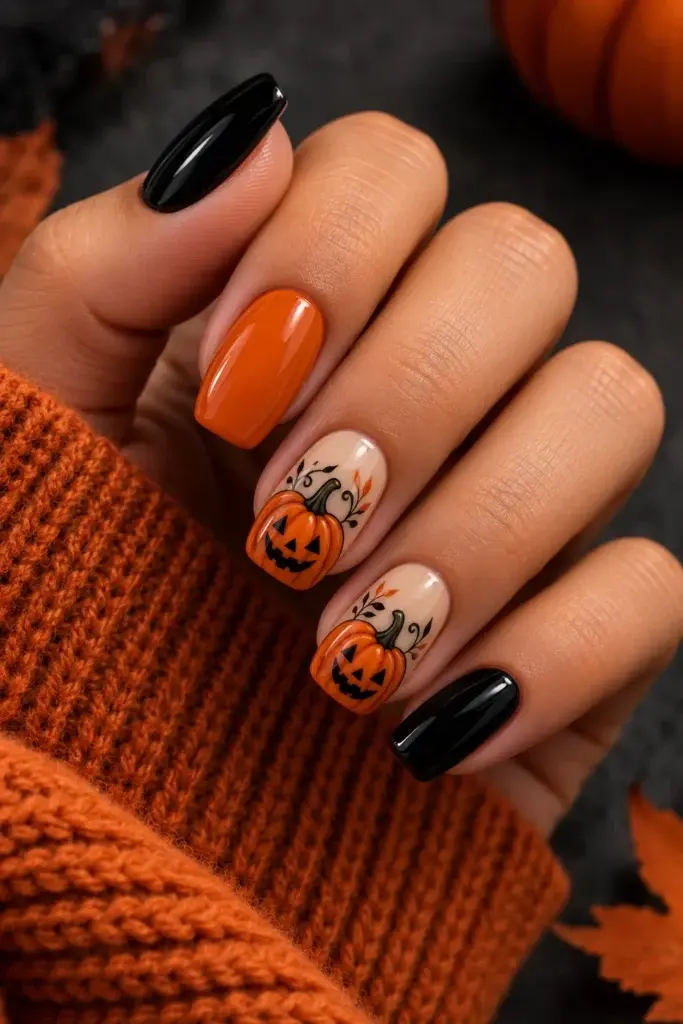
14. Pumpkin Spice Nails in Warm Autumn Shades
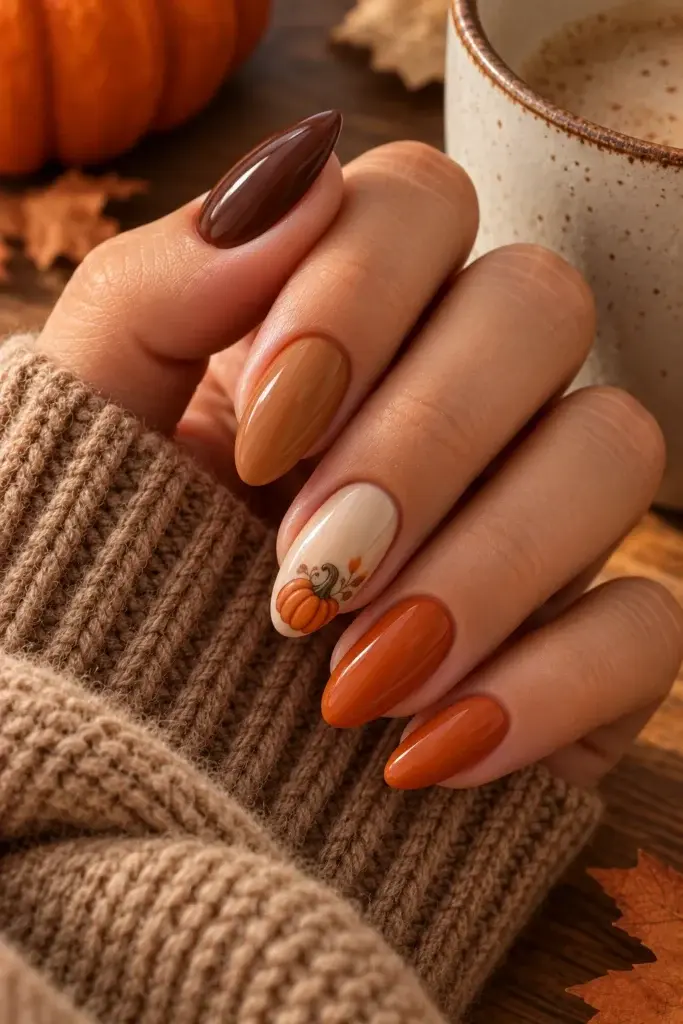
Pumpkin spice nails take inspiration from the colors associated with fall rather than relying on literal pumpkin illustrations. Combine cinnamon brown, caramel, burnt orange, and creamy beige across the fingers. A subtle gradient or alternating solid colors can create a coordinated manicure that feels warm and seasonal.
If you want a small amount of nail art, add fine swirls or a single pumpkin accent to one nail. Otherwise, let the color combination do the work. This look is especially easy to coordinate with neutral clothing, brown boots, and cozy knitwear. It also transitions naturally from early autumn into November because it is not tied specifically to Halloween.
15. Cute Orange Pumpkin Nails with Simple Accent Details
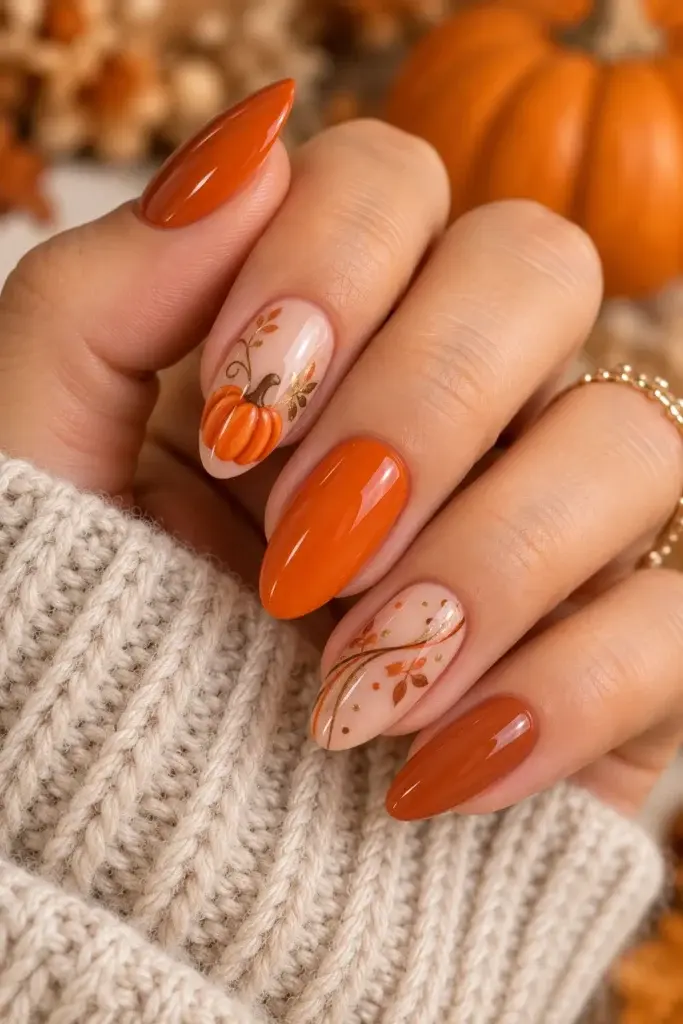
For a final look that brings several fall details together, combine orange pumpkin accents with a few simple coordinating designs. Keep one or two nails in glossy orange, use a nude base on the others, and add tiny pumpkins, fine dots, or delicate curved lines. The key is to choose just two or three details so the manicure feels connected rather than crowded.
You can make this design your own by changing the base shade, using a deeper rust orange, or adding a tiny gold accent. It works on several nail lengths and shapes as long as the artwork is scaled to fit. Save a reference image before your appointment so your nail artist can see the colors and details you like.
How to Choose the Best Pumpkin Nail Design
Before choosing a design, think about how bold you want your manicure to be and how much detail fits your nails.
- For everyday wear: Try minimalist pumpkin outlines, nude accents, or pumpkin French tips.
- For a colorful look: Choose bright orange polish or a mix of orange shades.
- For a softer manicure: Go with pink or white pumpkin designs.
- For extra shine: Consider chrome or fine glitter accents.
- For Halloween: Black-and-orange nails or tiny jack-o’-lantern faces feel more festive.
- For short nails: Keep the artwork small and use one or two accent nails.
- For a salon statement: Ask about raised 3D pumpkins or detailed almond-shaped nail art.
You can also bring a reference photo to your nail appointment and ask your nail artist to adapt the colors or details to your preferred length and shape. A design that looks beautiful on long extensions can often be simplified for shorter natural nails.
Tips for Making Pumpkin Nail Art Last
A little preparation can help your manicure stay neat for longer. Start with clean nails and use a base coat suited to your polish system. Apply color in thin layers, allowing each layer to dry or cure as directed. When adding pumpkin artwork, let the details set before applying a compatible topcoat.
Avoid picking at lifted polish or pulling off gel products, since doing so can damage the natural nail surface. Wear gloves when cleaning or washing dishes, and apply cuticle oil regularly to keep the surrounding skin comfortable. For raised 3D details, ask your nail technician how to care for the design and when to return for removal or maintenance.
Final Thoughts
Pumpkin nail designs can be as simple as one tiny orange accent or as detailed as chrome finishes and raised pumpkin art. The right choice depends on your preferred colors, nail shape, and how festive you want your manicure to feel. If you want something subtle, start with nude nails and a small pumpkin outline. If you love a statement look, try metallic orange, glitter, or black-and-orange Halloween details.
Save your favorite ideas from this list so you have a reference ready when it is time for your next manicure. A few thoughtful details are all you need to bring a little autumn style to your fingertips.
Frequently Asked Questions
1. What colors look best with pumpkin nail designs?
Orange is the classic choice, but pumpkin nail designs also look lovely with nude, cream, pink, black, brown, sage green, and gold. Choose orange and black for a Halloween look, or use cream and blush for something softer.
2. Can I get pumpkin nail designs on short nails?
Yes. Short nails work well with tiny pumpkins, simple outlines, orange polish, and small accent designs. Keep the artwork uncomplicated and avoid placing too many details on one nail.
3. Are pumpkin nails suitable for the whole fall season?
Yes. Neutral pumpkin accents, pumpkin-spice colors, white pumpkins, and orange French tips can work throughout autumn. Jack-o’-lantern faces and strong black-and-orange combinations feel more specifically suited to Halloween.
4. How can I make pumpkin nail art at home?
Apply your base color, let it dry according to the polish instructions, and use a fine nail-art brush or dotting tool to create a small orange pumpkin. Add a thin stem and a few curved lines, then finish with a compatible topcoat. Nail stickers are another option if you want a simpler application.
5. What is the difference between pumpkin nails and pumpkin spice nails?
Pumpkin nails usually feature a pumpkin shape, illustration, or jack-o’-lantern detail. Pumpkin spice nails focus more on a warm fall color palette, such as cinnamon, caramel, rust, cream, and burnt orange, and may not include pumpkin art at all.